Have you ever drawn a pair of eyes, and wondered how to colour them in way that makes them look full of life?
I know I have. And over the years, I’ve reached a method of digitally colouring eyes that I find really pretty. You may not like my particular style, or you may draw with traditional materials rather than digital, but I still hope this tutorial will help you learn some techniques about colouring eyes.
I will say that most of my technique comes from the fact I usually draw anime eyes, and this really sprang out of me trying anime-esque techniques on a drawing I did for an art course I’m taking. While the drawing in this tutorial could be classed as a more realistic anime style, I think we’ll just refer to it as stylised, as the art course this picture sprang from was teaching me to use photo reference to draw stylised eyes.
This tutorial isn’t about drawing eyes, though — it’s about colouring them, filling them with life, making them full of character.
With that out of the way, let’s dive right in!
Step 1: Start with a Base Colour
Here’s the sketch I did that I’ll be using for this tutorial:
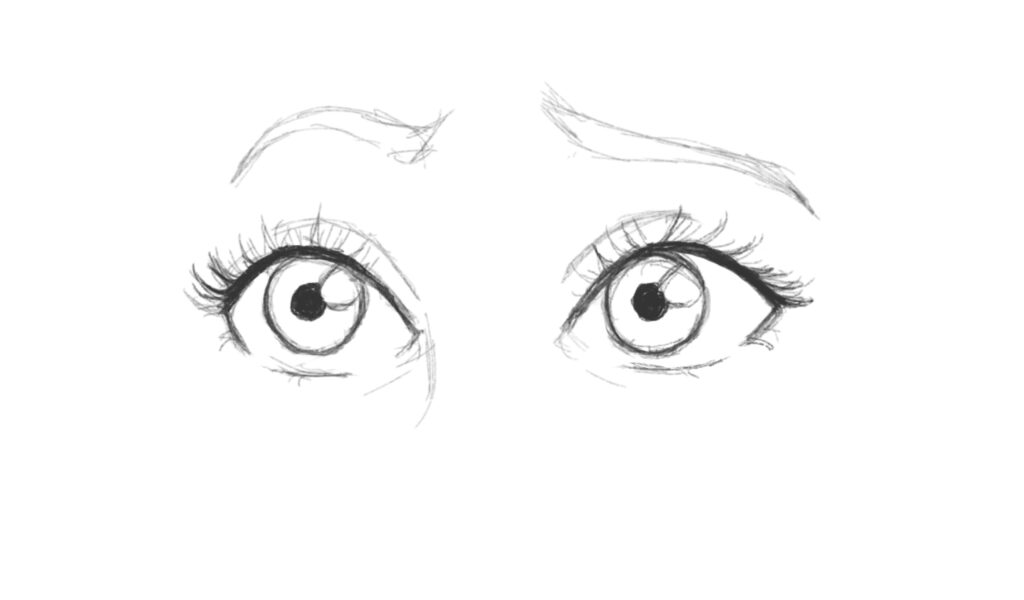
There’s actually a problem with it that I fix later … which is to say, the eyes are too close together. You have to start somewhere, though.
I imagined these eyes to be a more realistic drawing of one my own characters’ eyes — a girl with brown eyes, to be specific. So I start with a base colour here, keeping it light, as I know I’m going to add darker shades on top later:
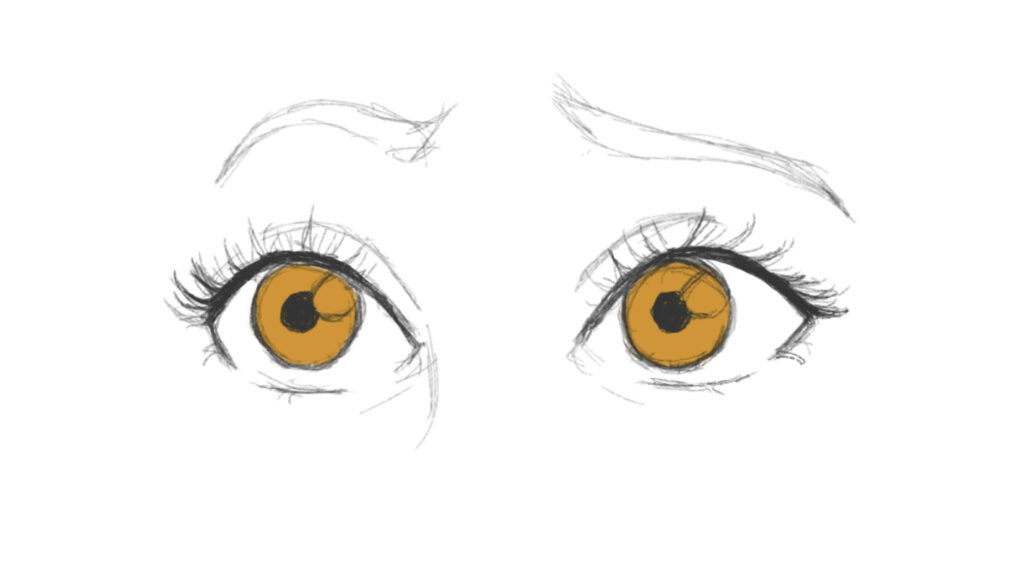
I made it a light brown/burnt orange on purpose — having a very light and fairly saturated base helps with a technique I will use later on. In the meantime, this first step is nice and easy. Which brings us to the next step.
Step 2: Add a Second, Slightly Darker Colour on the Same Layer. Then Blend Them Together
What? Using two colours on the same layer? This is a little more complicated, so let’s break it down.
First, add a layer of a slightly darker colour overtop of your base — and completely ring the outer edge of the eye with this shade, fairly thickly. (See picture for how thick.)
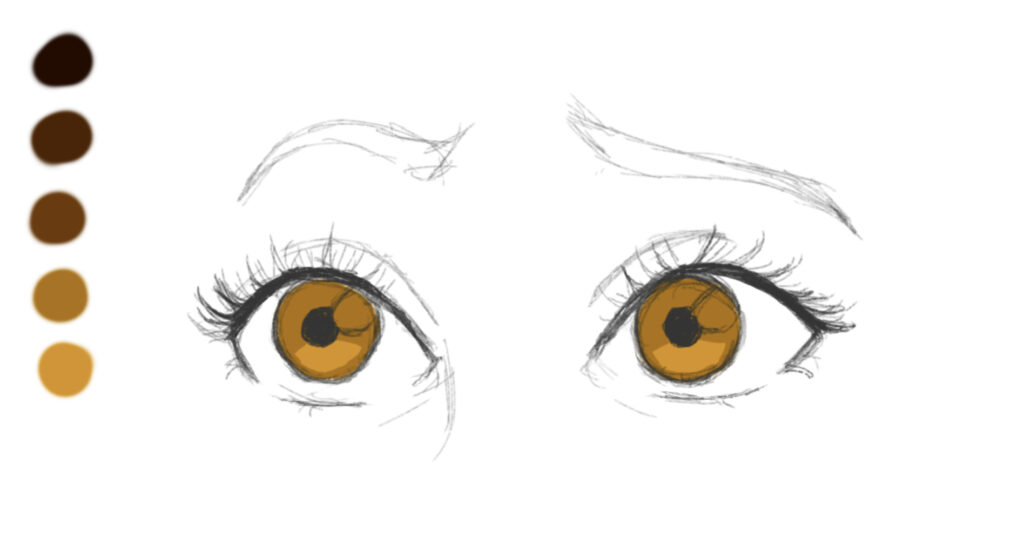
You may also notice I added my colour palette for the eyes along the side — this is a shortcut that really helps when you’re drawing digitally, as you can easily use the eyedropper to select the colour for that layer. If you’re painting or using markers, then you probably have all the colours you need at hand anyway. (Hopefully. Unless you’re like me and keep them all in different containers, mugs, tins, and various other pieces of storage equipment for traditional art materials.)
Now that I’ve done that, I use the blend (or smudge) tool to smooth the transition between the colours:
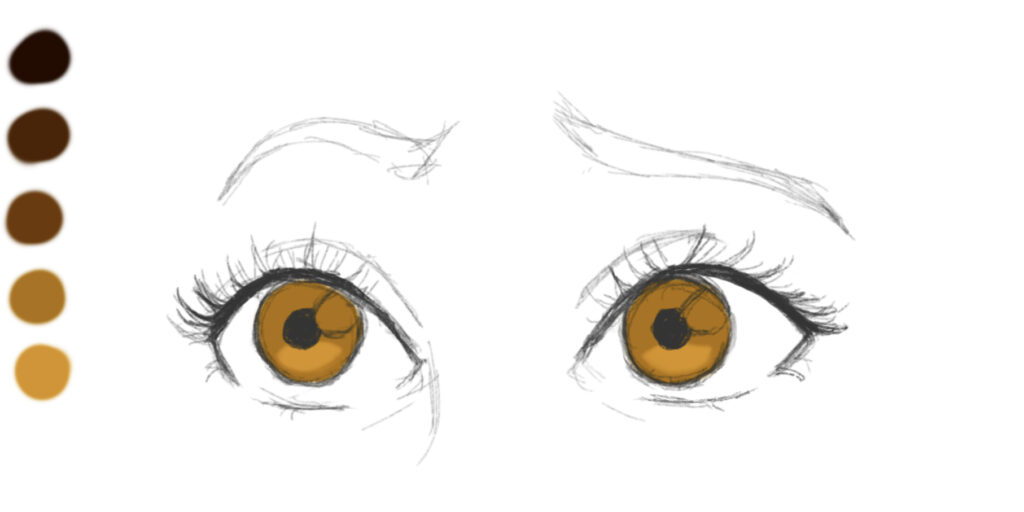
It makes it look a little softer. Be careful as you smudge, though — make sure to blend both ways — darker colour in, lighter colour out. You don’t want to leave traces of the direction of your smudging, so keep a sharp eye on that. (I had to.)
Next step!
Step 3: Add Another Darker Layer. Then Another Even Darker Colour on the Same Layer. Blend
But that sounded like several steps … you may be thinking. It is and it isn’t — because this is all on the same layer again, I’m counting it as one step with multiple parts. Part one: add another darker layer:
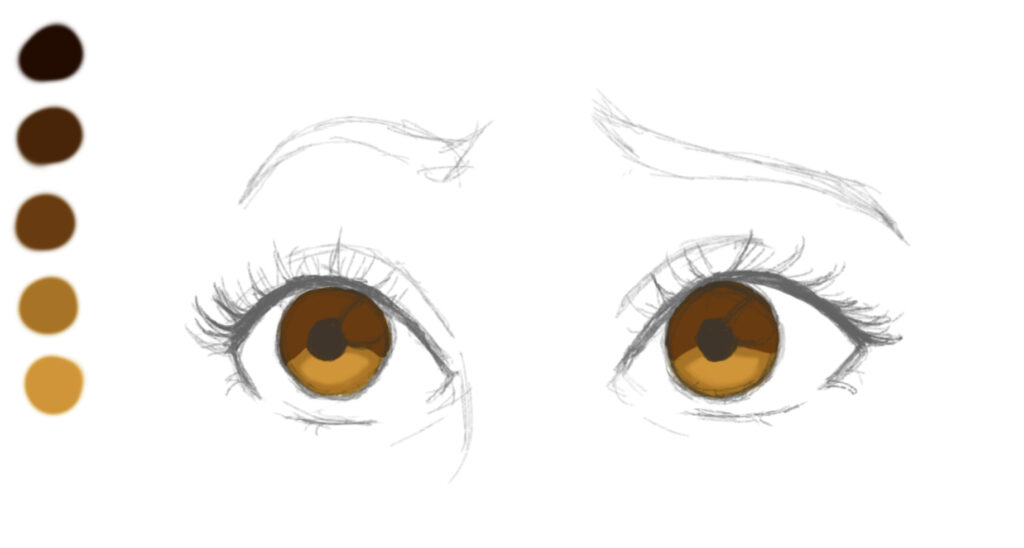
This one shouldn’t ring the irises, but it should go down at angles lower than the middle of the pupil. Now Part Two: add another darker colour on top of that:
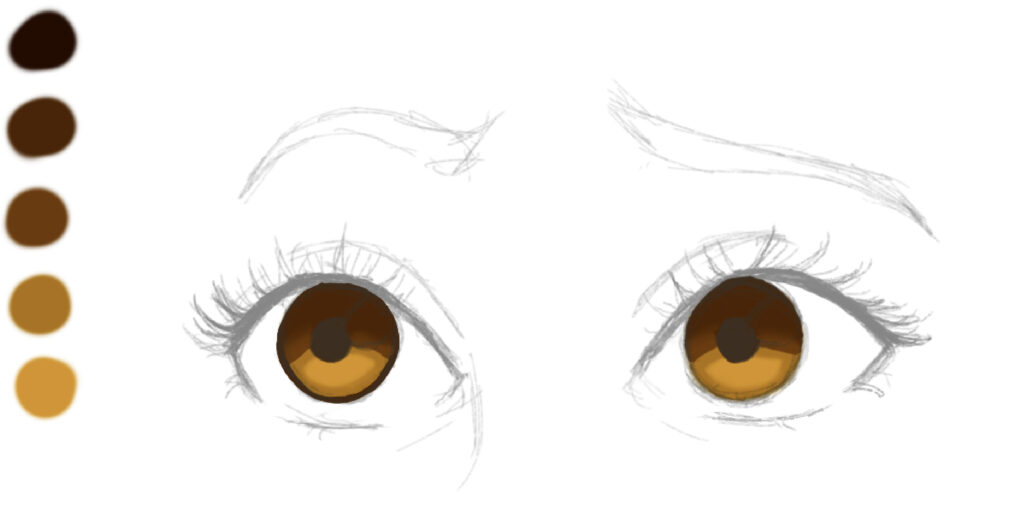
This colour should ring the irises. I did it on only the left iris here to make the comparison. I’ve also already blended this colour into the one before — it’s basically a repeat of step two, so check that out if you want to know how to blend.
When it comes to this outline, it isn’t as thick as the one in step two, but it is extremely important. It is the outline of your eye. It prevents you from needing a normal outline, giving you the ability to make the eyes look more natural. And this outline shouldn’t be blurred — we want it crisp.
Once you’ve added this layer and thin outline to both eyes, we move onto step four — but there are some bits unrelated to the eyes between steps three and four, so I’ll show those here.
Bonus Step 3 & 1/2: Add Colour to the Face, Eyebrows, Eyelashes, and the Rims of the Eyes
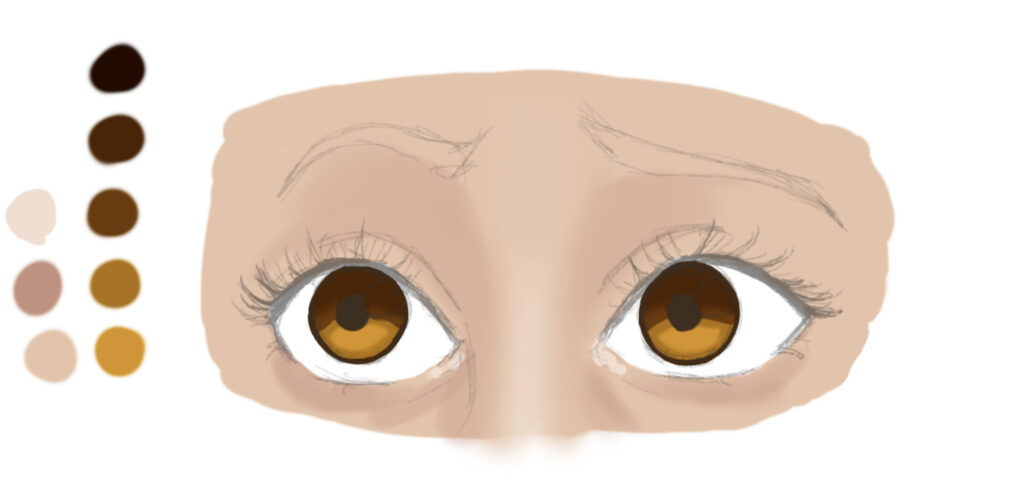
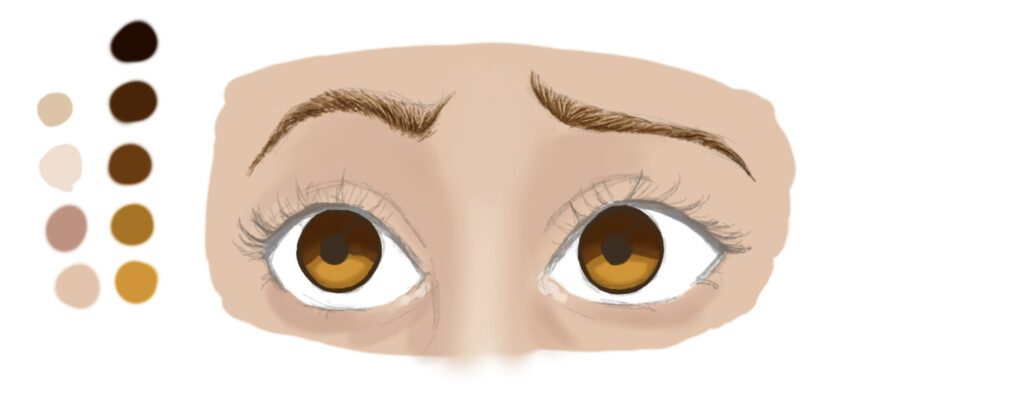
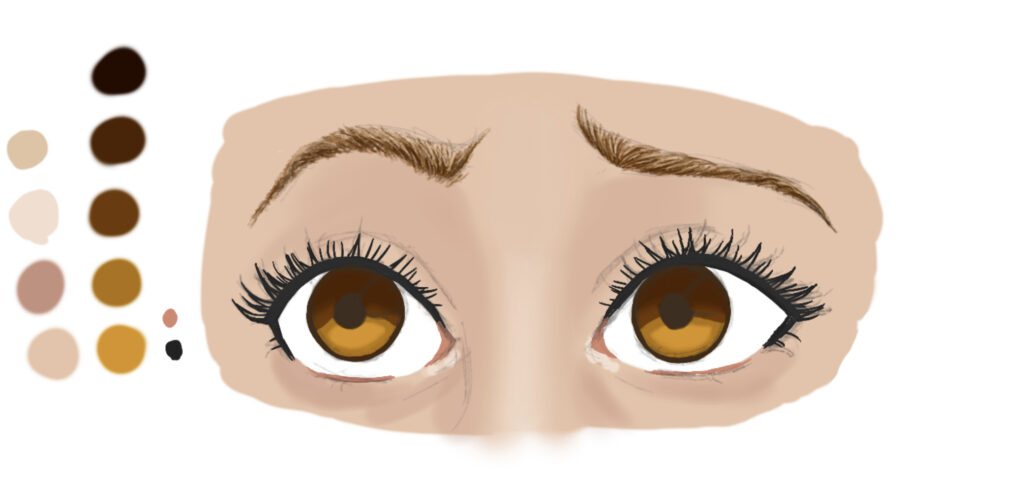
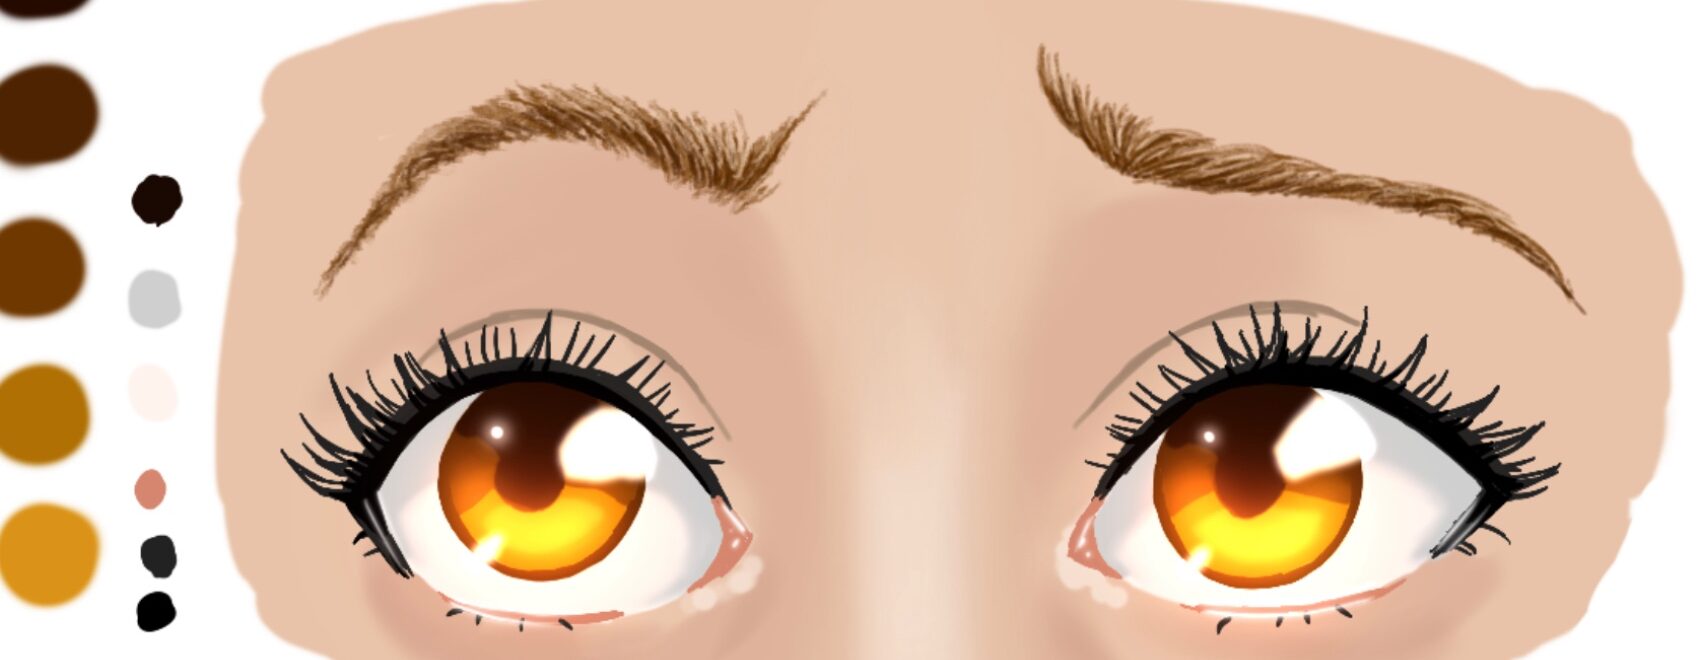
I’ve shown my palette on the side to help. I used a normal medium airbrush for the face, a pencil for the eyebrows, and a pen for the eyelashes and tear ducts/eye rims. Now, onto step 4!
Step 4: Make the Whites of the Eyes a Very Light Peach, and add a Grey Shadow to the Top and Corners. Blend Lightly
This step is important, and many beginning artists miss it. (Including me, when I first started out.)
Making the white of the eyes a light peach, or any kind of colour — depending the skin tone — that isn’t a true white, will give more power to the highlights when we put them in. It will contribute to making the eyes truly shine and seem alive.
And adding the shadow at the top makes it feel more three-dimensional. In most anime drawings, you would only place the shadow at the top — because this illustration is slightly more realistic, I added the shadow at the corners as well, to aid the overall feel of the piece.
Here’s an example of how anime eyes would traditionally have this shadow, and then how I did it for this tutorial:
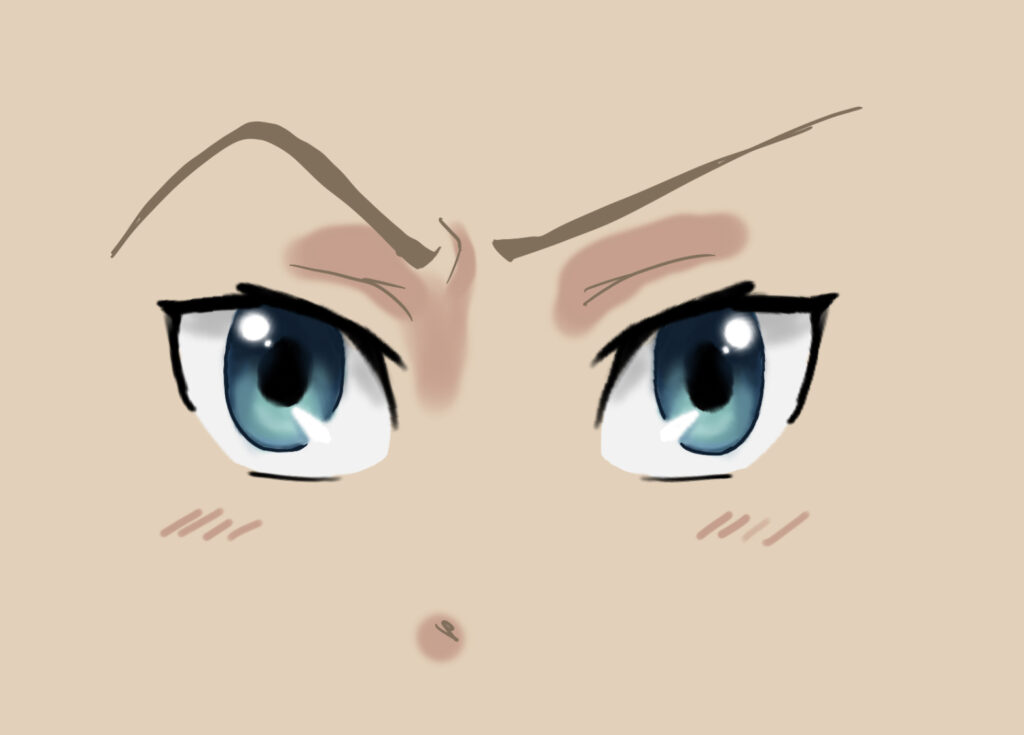
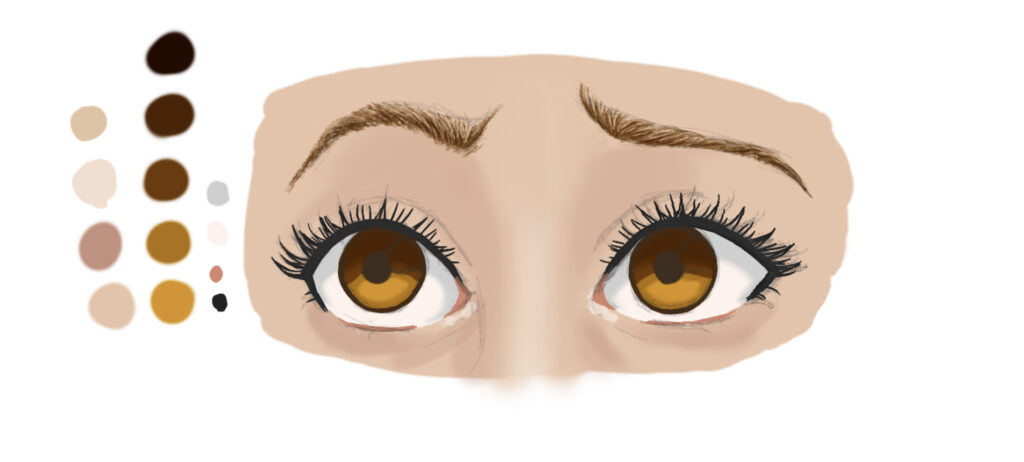
Anime is a lot more simplified.
You can also use a slightly grey off-white for the whites like I did in the anime picture — it all depends on what you want. To be honest, using a light-grey-white calls the least attention to itself, so its probably best for most stylised illustrations.
Now that we’ve added the whites of the eyes and their shadow, it’s time to move to the final step of the ‘normal’ colours! Exciting!
Step 5: Add Another Darker Colour Onto the Pupil and Upper Iris Only
This is on a new layer again, and we finally get to use the darkest of our darks! Here we go:
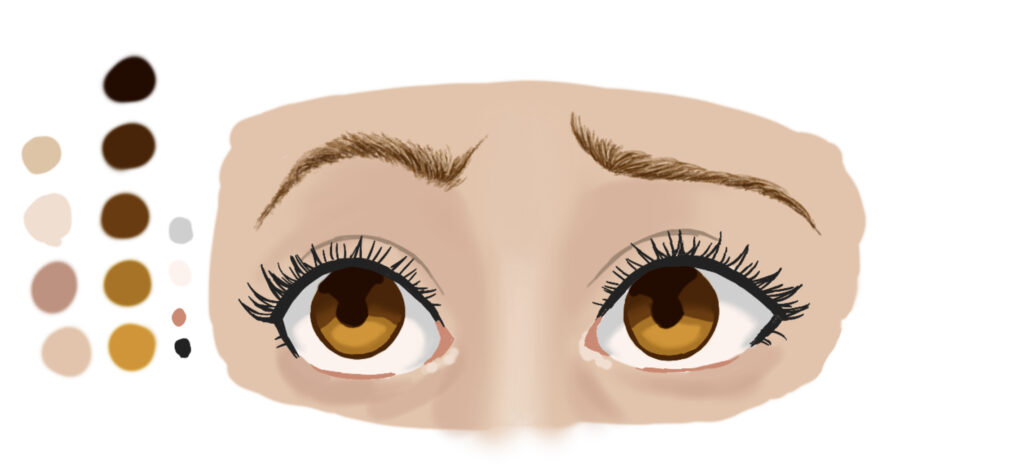
For all this time, the eyes have been looking pretty lifeless. They’re almost creepy at the moment. Which is where the fun comes in …
Step 6: Add the Highlights. Use Pure White
It depends on where your light source is as to where you should place the highlights. I decided mine was coming primarily from the top right corner of the picture.
Now, let’s make these eyes come to life:
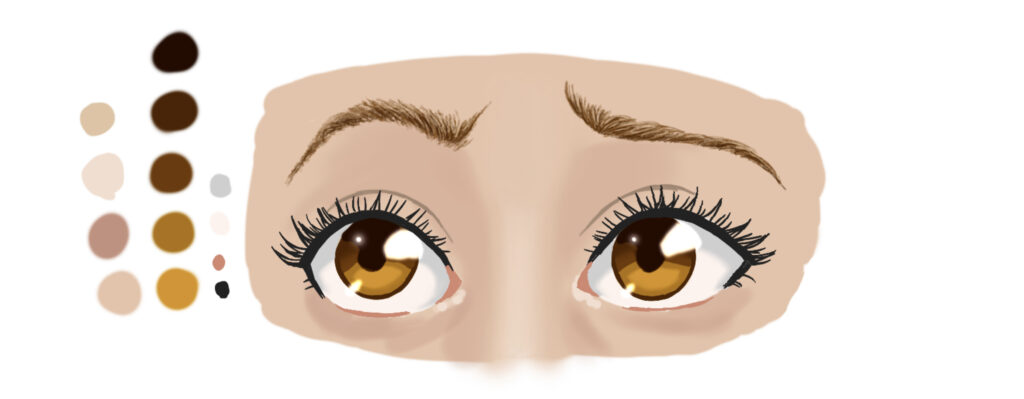
Wow! Doesn’t that make a huge difference? I always love getting to the highlights stage, as it’s where the eyes finally start becoming beautiful.
You could actually stop here and this picture would be fine. The eyes are full of life from the highlights alone.
But I have a couple of extra tricks I like to use to make my eyes really shine.
Step 7: Using an Add Layer to Add Shine to the Eyes
Before we get into this, I will just show you an adjustment I made to this drawing. I actually moved the eyes further apart here, as they were too close together — I also added a sparkle on the tear-duct and lower lashes, to make them look more realistic/wet and pretty:
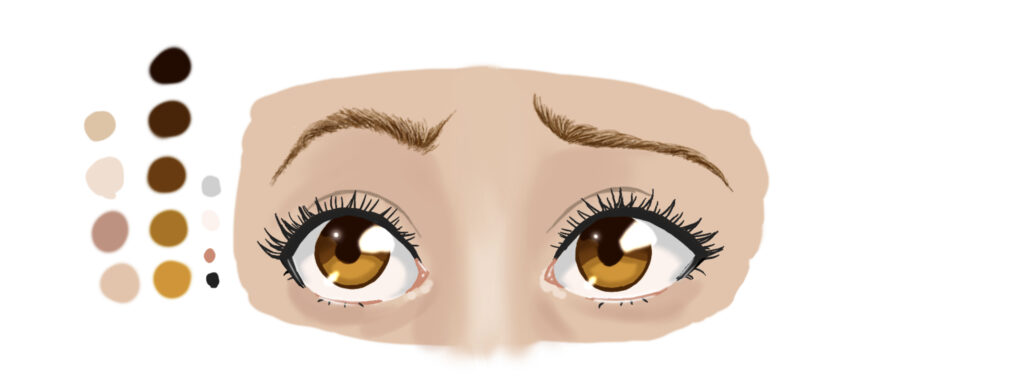
The difference may be a little hard to tell — but it’s there.
And it was driving me crazy before.
Anyway, onto the actual part of this step. (I will put in bold the key words, as this is a lot of info to take in.)
First of all, create a new layer, and set the blending mode to Add. You should be able to do this whether you’re on Procreate like me, or Photoshop, or Clip Studio Paint, or whatever. Most digital art softwares will have the add blending mode available for your layers.
(If you’re following along with traditional materials, then you could use a lighter coloured dry pastel. (Not an oil pastel. I mean the chalky ones you can smudge.) You could lightly smudge it along the bottom of the iris to create a similar effect — not quite the same, though. To be honest, if I was using traditional materials, I would probably stick to the version with just the highlights — and I might have used an even lighter base colour in the first place.)
For digital artists: once you’ve set the blending mode to add, choose a colour that’s even darker and more saturated than the darkest colour you used for your pupils and upper irises. Why a darker colour? If you’ve ever used the Add blending mode before, you’ll know that the darker the colour, the more subtle the burn.
Also, turn the layer opacity down to 67%. I know that’s a weird number, but that’s the value I ended up liking.
Finally, colour in lower part of the iris using a light-pen or a light-brush — whichever works best for you. (In Procreate, you get a whole set of default lighting brushes. I generally prefer to use the light-pen — it’s easier to control.) Try not to colour the pupil — it’ll get a little of the glow anyway:
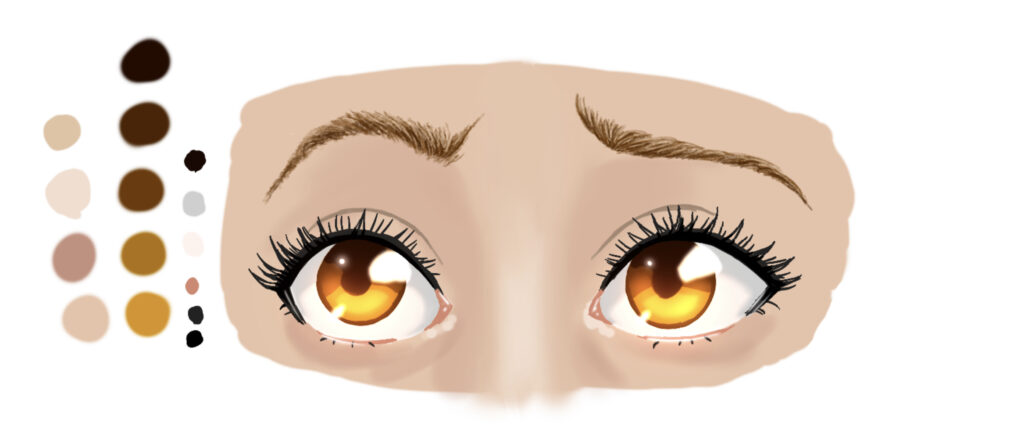
Doesn’t that look beautiful? I think I may have used the Gaussian Blur slightly as well, to take away any sharp edges.
I love this step, as it always seems to be to be the part where the eyes truly come alive.
If you’re obsessive like I am, you may want to add a second, smaller echo of that layer on top, on another layer, just to give it a bit of extra glow:
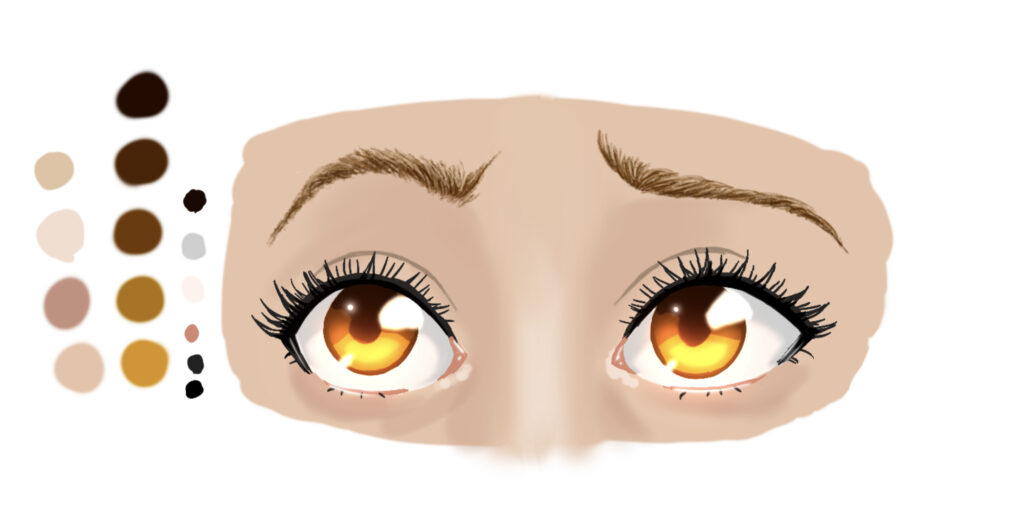
So pretty … gotta love that glow. Lighting really is a powerful thing.
Conclusion
And there you have it! The finished illustration of semi-stylised, fully coloured eyes. The final step, adding those two glow layers, is always my favourite. I love watching the eyes shine and come alive.
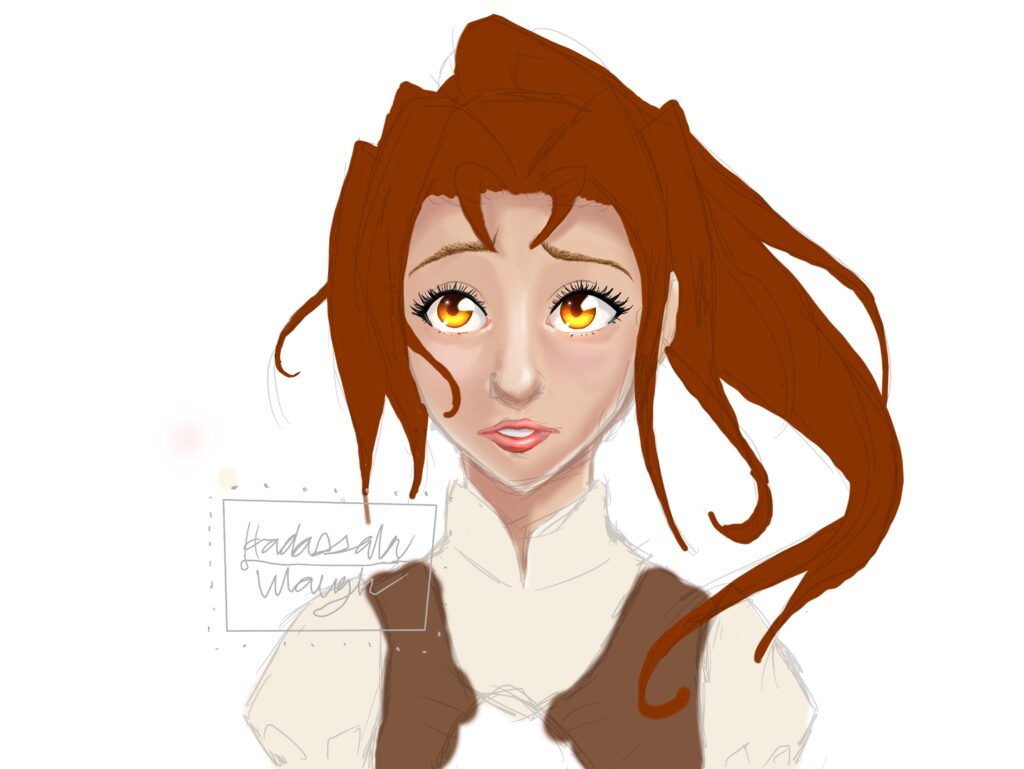
Of course, it always helps when the eyes are in a face. Here’s the work-in-progress of the character I’m drawing to go with these eyes:
I hope you enjoyed reading this/following along as much as I enjoyed painting these eyes! I really love drawing and colouring eyes more than anything else, because they are so beautiful — the feature point of any face, the window to the soul. And I love making them as beautiful as I can!
Thanks for reading! I hope you enjoyed, and can now make your own eyes sparkle with colour and life! If you’ve picked up even one technique you can apply to your own art from this, then I’m happy. I really enjoyed sharing these tips I’ve learned over time.
Your turn, Storykeepers! Do you like drawing/colouring eyes? And was this tutorial helpful? Would you like me to do more like it in the future? Please let me know in the comments!

I love your drawings, your soo talented, I hope this will help me with future drawings that I do, love you heaps big sis.
I use this blog almost every time I draw eyes now!
Thanks so much for making it.
You’re such a talented artist.
I’ve read this blog so much, that when I draw I remember your formula!
You’re an amazing person, sister and artist